Myself Narender Singh Thakur ( NST ) and i share my Experience/Knowledge and Tricks for folks and beginners to solve their issues while making websites through this Planet.
Great choice! WordPress is a popular and user-friendly content management system (CMS) that allows you to create and manage websites and blogs without extensive technical knowledge. Whether you want to build a personal blog, a business website, an online store, or anything in between, WordPress can be a versatile solution.
Here’s a step-by-step guide to help you get started with WordPress:
1. Choose a Domain Name and Web Hosting:
A domain name is the address of your website (e.g., www.nstwebcreation.com). Choose a domain name that represents your brand or content.
Web hosting is where your website’s files and data will be stored. There are many hosting providers available, such as Godaddy, Bluehost, SiteGround, or HostGator etc.
2. Install WordPress:
Many web hosting providers offer a one-click WordPress installation option. Once you’ve signed up for a hosting plan, you can usually find this option in your hosting account’s dashboard.
After installation, you can access your WordPress dashboard by visiting www.nstwebcreation.com/wp-admin. Log in using the credentials you set during installation.
4. Choose a WordPress Theme:
A theme determines your website’s design and layout. You can choose from thousands of free and premium themes available in the WordPress theme directory or from third-party theme marketplaces.
5. Customize Your Website:
In the WordPress dashboard, go to Appearance > Customize to make changes to your site’s logo, colors, fonts, and other visual elements.
6. Install Essential Plugins:
Plugins add functionality to your website. Some essential plugins include Yoast SEO for search engine optimization, Akismet for spam protection, and Jetpack for security and performance.
7. Create Pages and Posts:
Pages are static content (e.g., About Us, Contact Us), while posts are timely and appear in reverse chronological order (e.g., blog posts). You can create them in the WordPress dashboard under Pages > Add New or Posts > Add New.
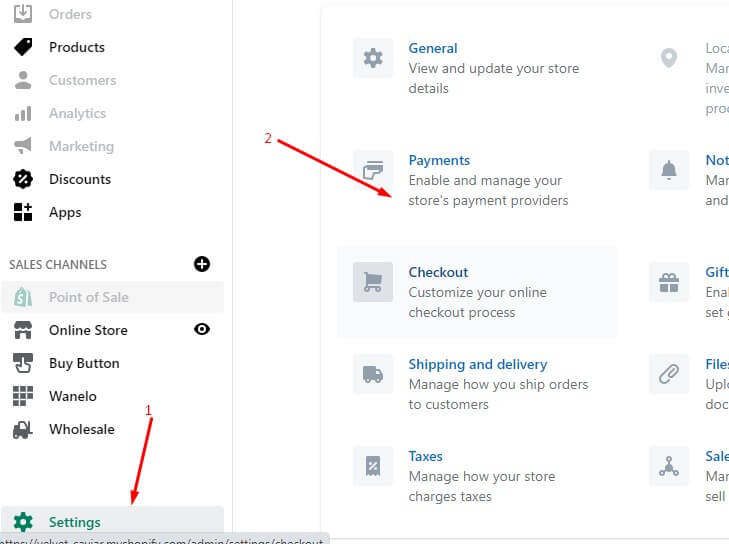
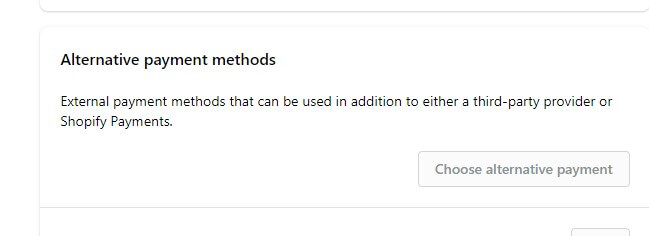
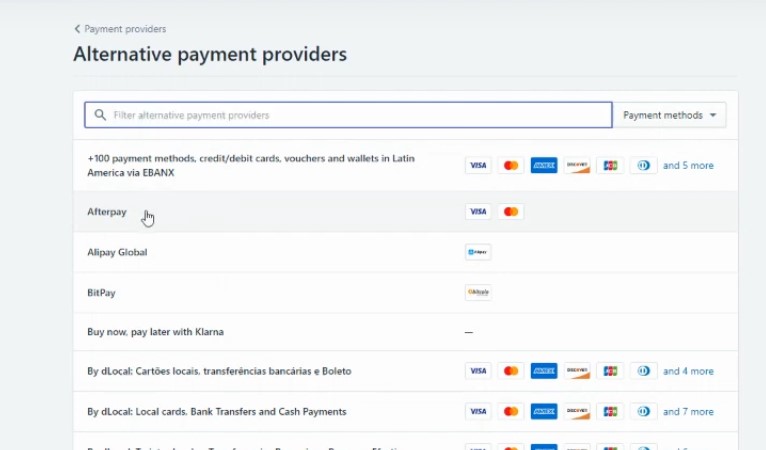
Go to Settings in the WordPress dashboard to configure general settings, permalink structure, reading settings, and more.
9. Optimize Your Site for SEO:
Use SEO best practices to improve your website’s visibility in search engines. Write valuable content, use relevant keywords, and consider using an SEO plugin like Yoast SEO.
9. Regularly Update and Maintain Your Website:
Keep your WordPress core, themes, and plugins up to date to ensure optimal security and performance.
I hope this helps you a lot … how to start a blog website easily ..
If you need any further help please contact me with contact form or chat box or other way i added in the website.
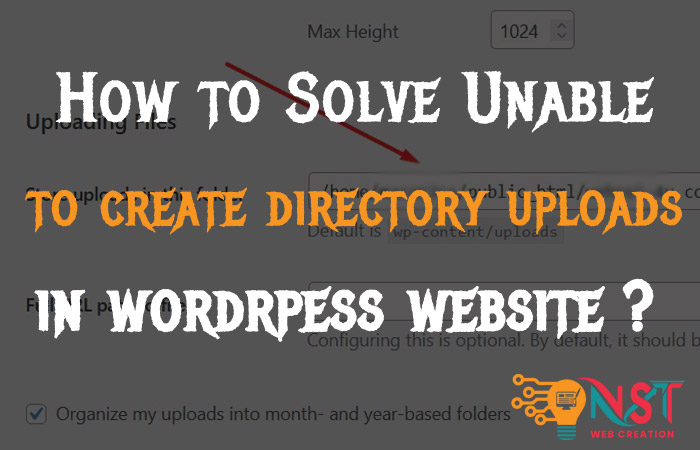
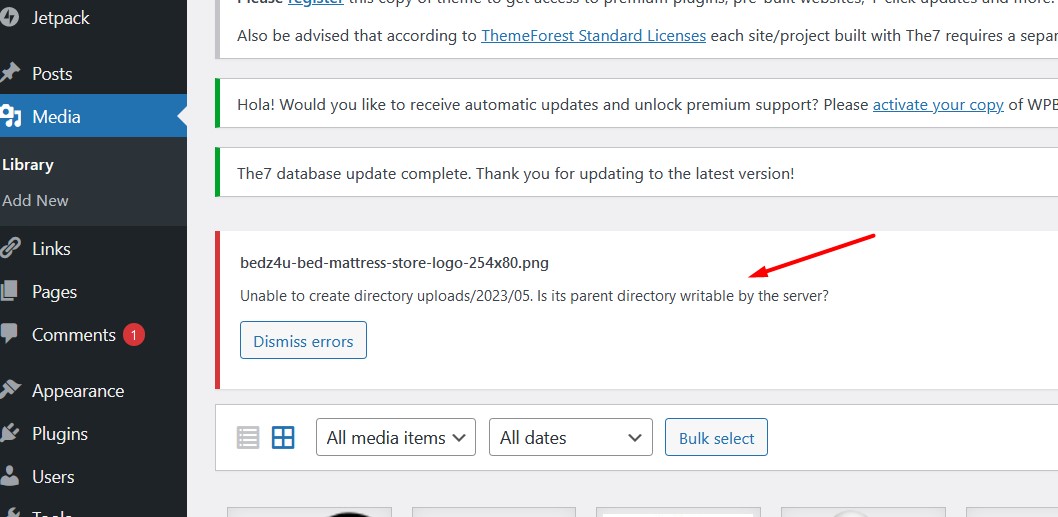
Unable to create directory uploads/2023/05. Is its parent directory writable by the server?
Sometime when we try to upload images or media to website then it shows there this type of message…
Here are a few steps you can take to troubleshoot and resolve the problem:
Most of time this issue occur after move or transfer of wp site to new place or hosting…
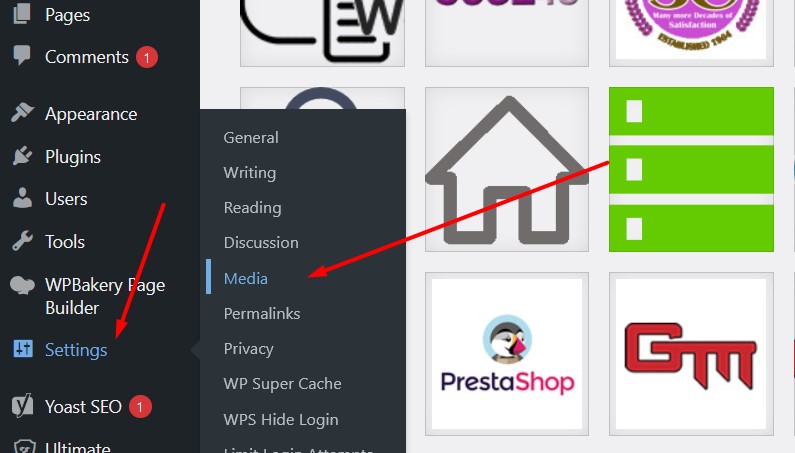
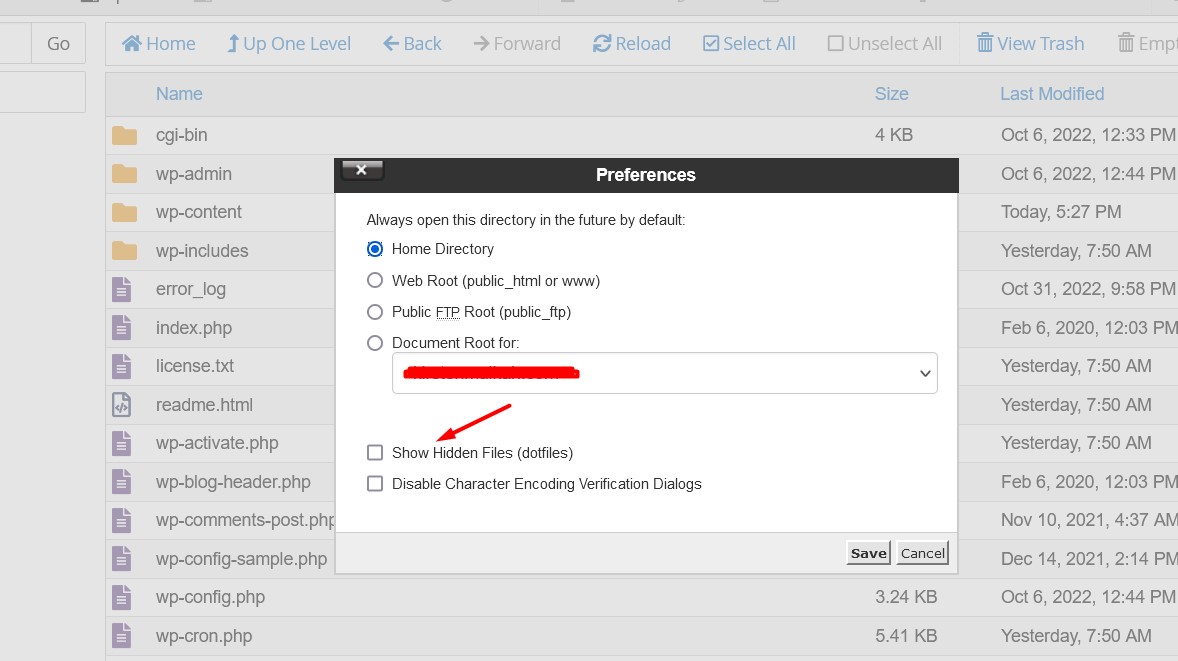
One of the main issue is wrong file upload path mentioned in media dashboard.. you can check by visiting Settings > Media ..
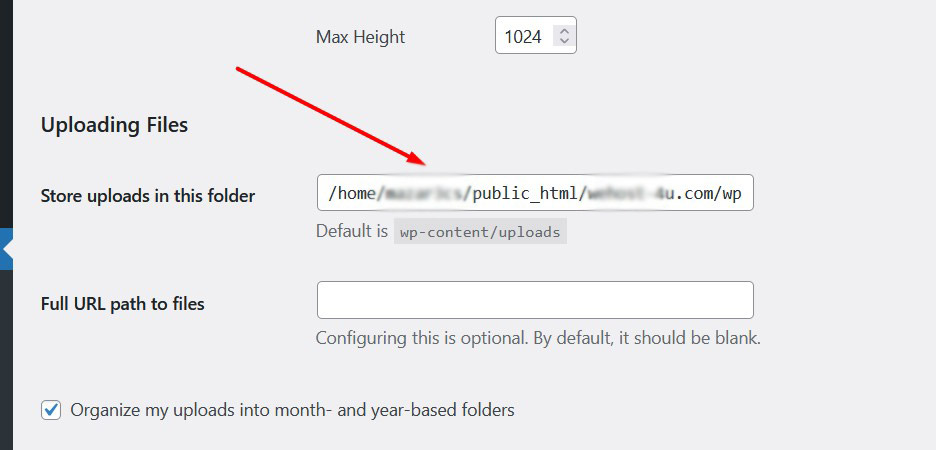
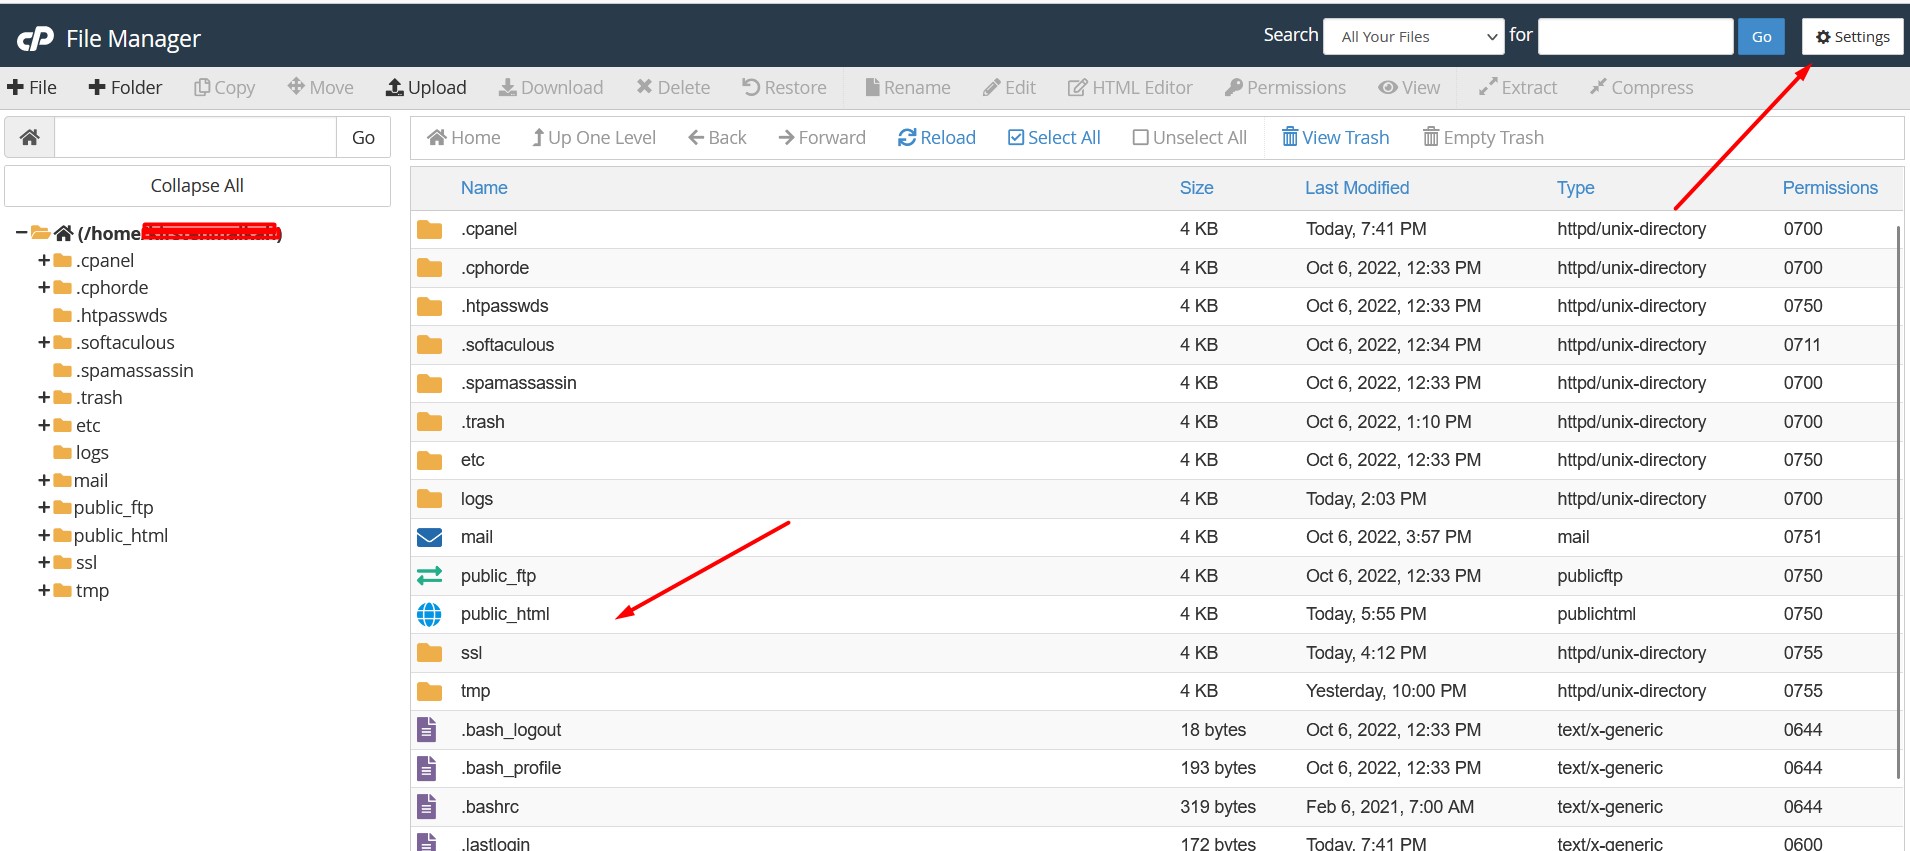
Here is your current path to upload media… now goto cpanel/hosting and check there the file path and match with it..
Login to cpanel/hosting to check your upload files path… copy this and replace this with your wp dashboard path as mentioned above … make sure both path address should be same…
Simply you can change path before /public_html/ in between /home/******/public_html/
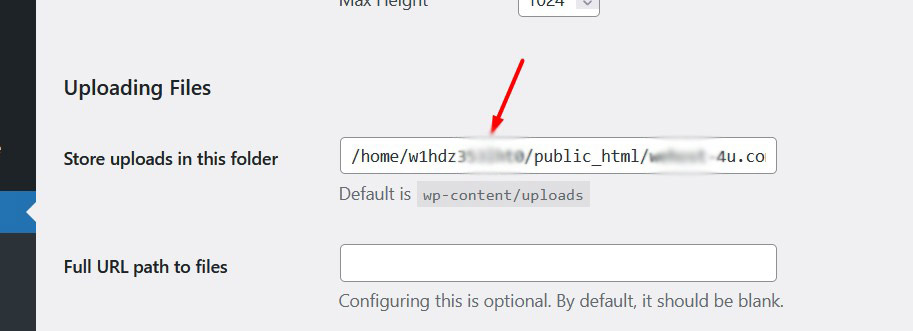
Like below… i added new path of cpanel…
Now click on Save changes and try to upload file now to media…
By following these steps, you should be able to resolve the issue and create the “uploads/2023/05” etc directory successfully.
If you need any further help please contact me with contact form or chat box or other way i added in the website.
So here are the other Queries related to this Topic …..
Disable XML-RPC in wordpress
How to disable xmlrpc.php for WordPress?
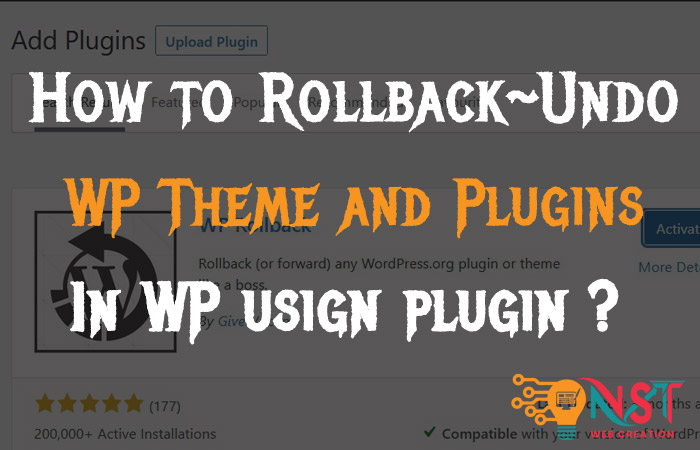
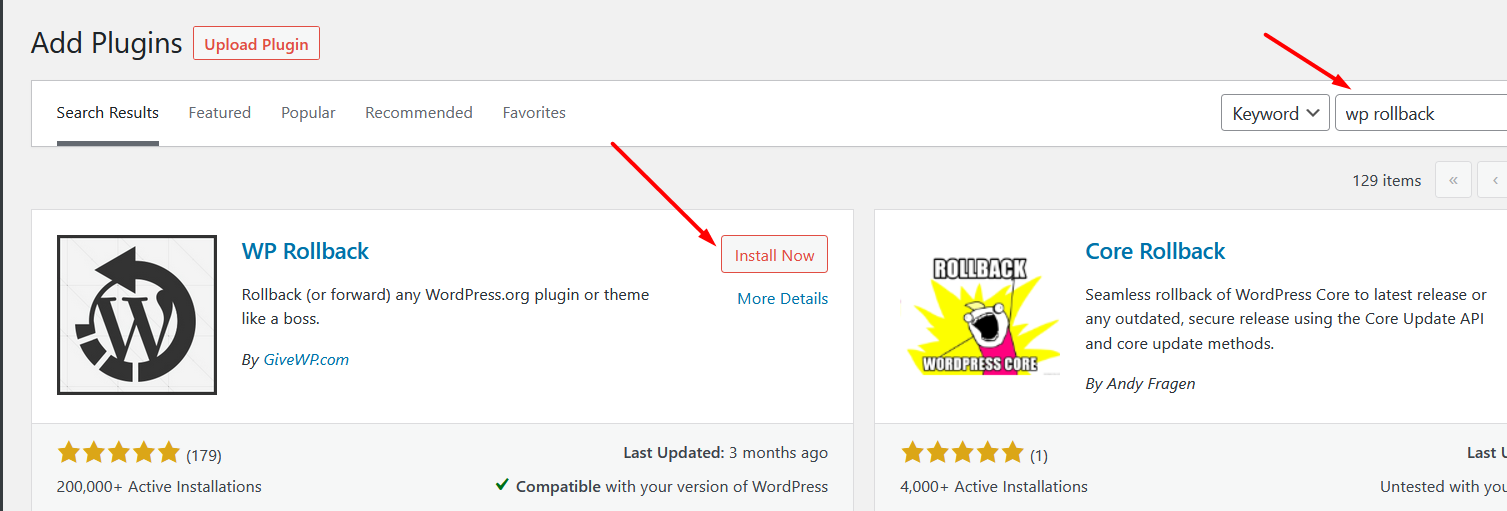
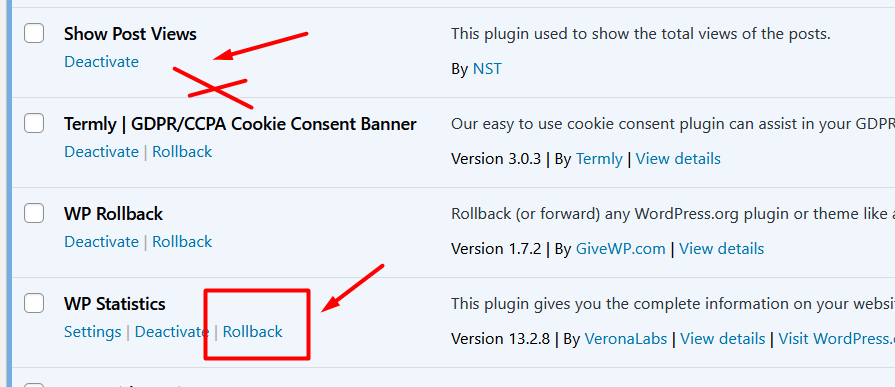
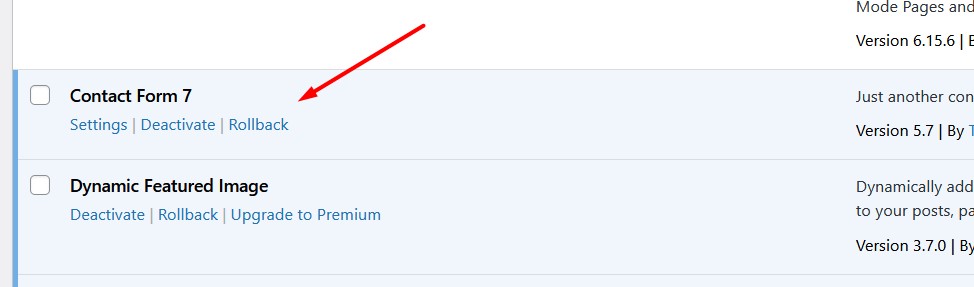
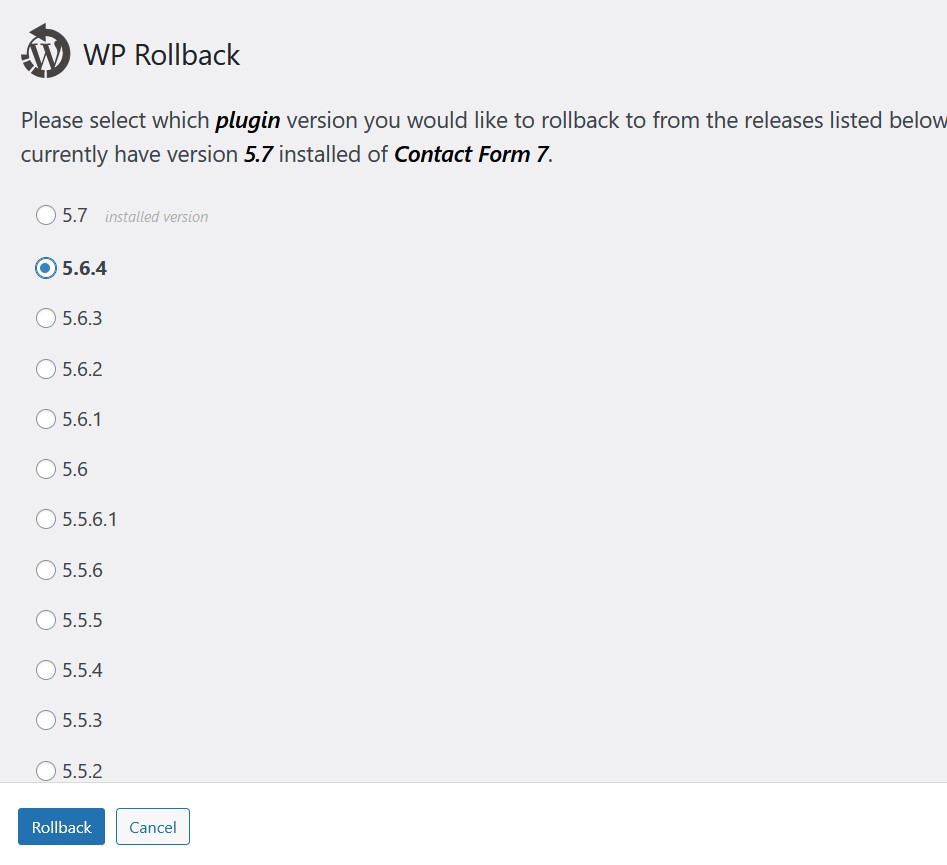
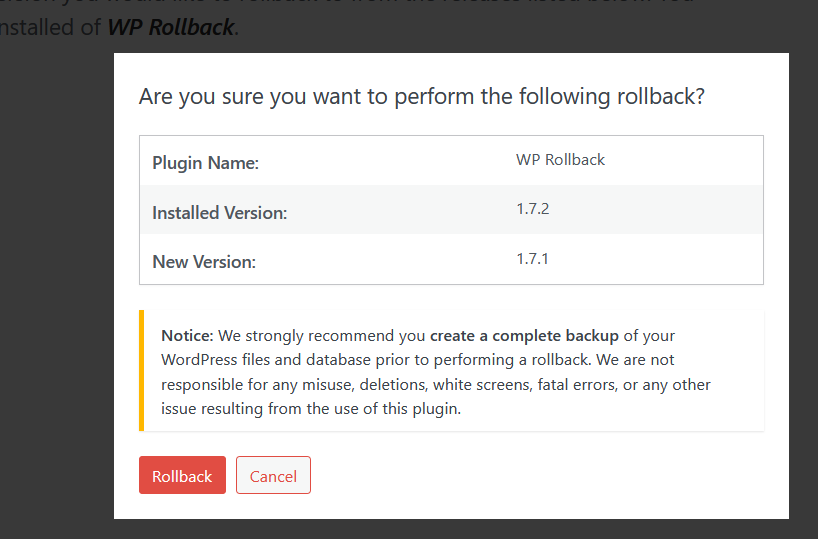
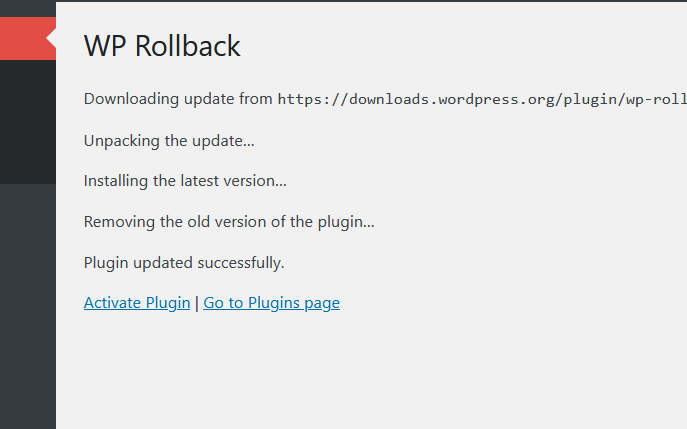
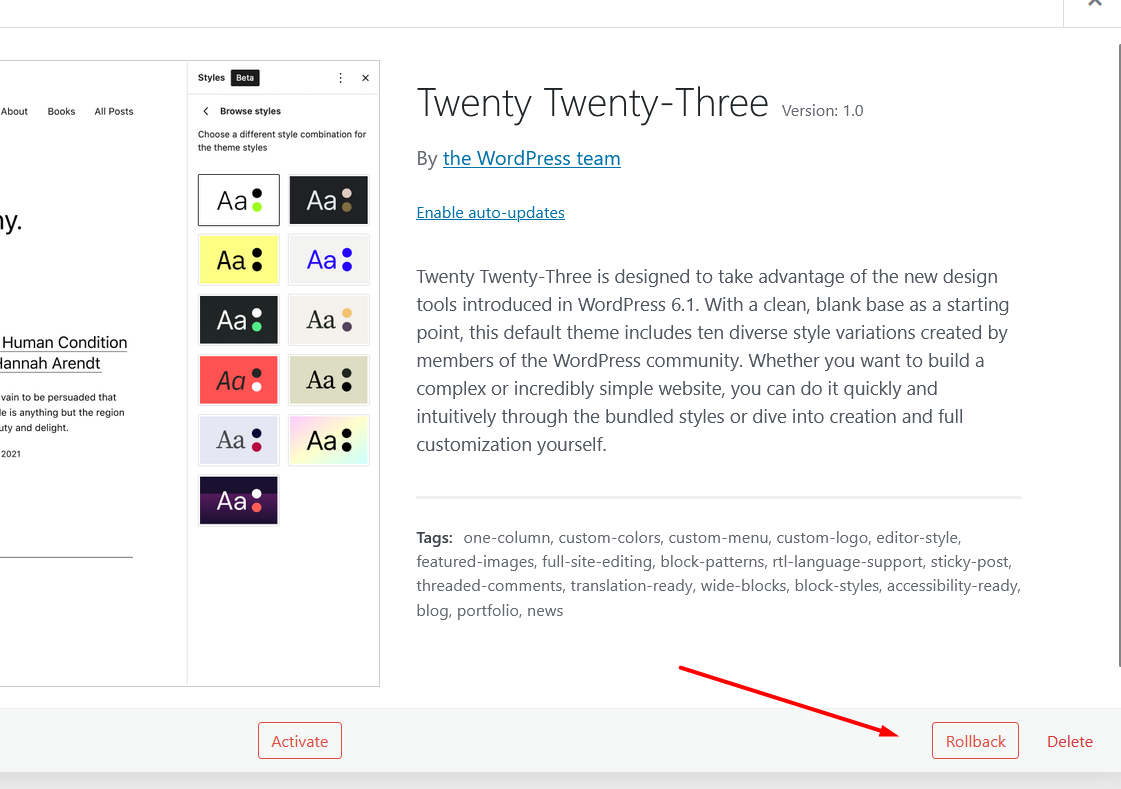
How to rollback plugins and themes in wordpress ?
How to stop xmlrpc brute force attack ?
disable xml-rpc file wp
how to stop a wordpress xml-rpc attack ?
how to disable php xml-rpc ?
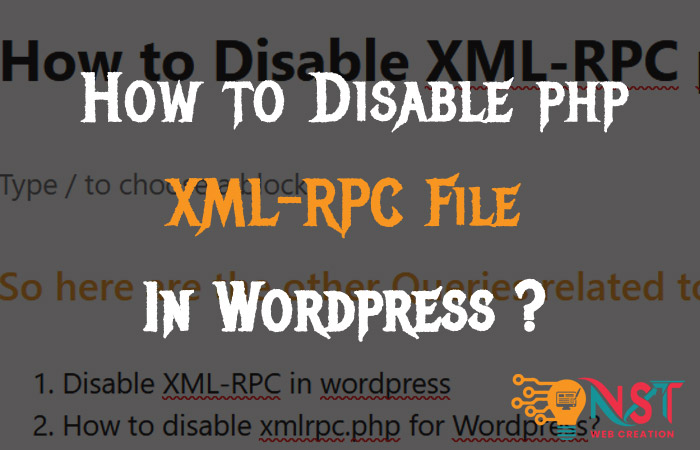
What Is xmlrpc.php in WordPress and Why You Should Disable this file..
In this article, we’ll show you how to easily disable XML-RPC in WordPress.
What is XML-RPC ?
XML-RPC for WordPress was designed to enable remote connections between your site and external applications.
In short, it is a system that allows you to post on your WordPress blog using the WordPress mobile apps or other remote blogging apps and some other certain things.
Why should I disable XML-RPC ?
The main reason to disable this is to close one more door for hackers .. Brute Force Attacks – Where an attacker can use xml-rpc to test hundreds of username and password combinations until they are eventually able to gain access to your site.
Here are the ways to disable xml-rpc file…
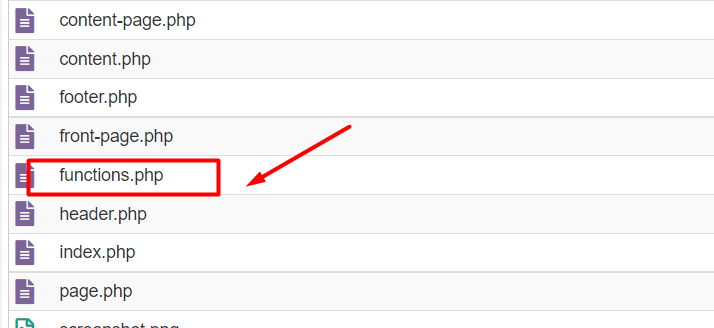
First : Through the functions.php file..
add the below code to your website functions.php file.. and hit save button.
add_filter('xmlrpc_enabled', '__return_false');
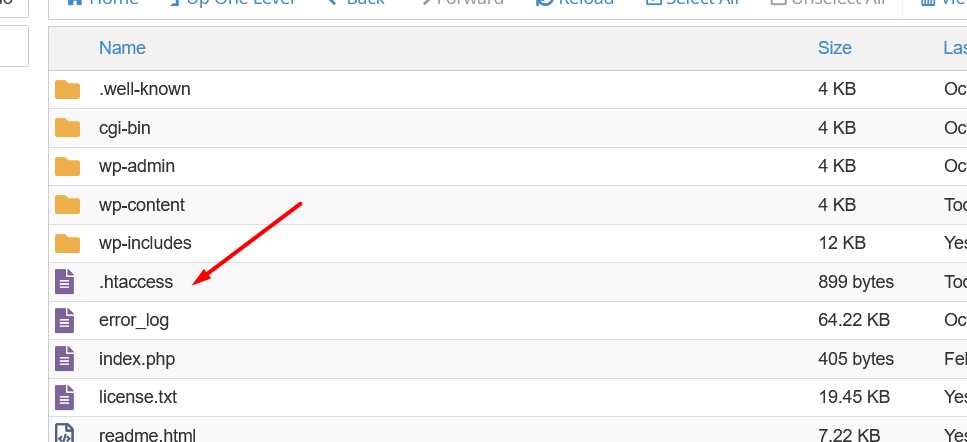
Second: Through the .htaccess file…
Edit your .htaccess file and simply add this code there..
# Block WP xmlrpc.php requests
<Files xmlrpc.php>
order deny,allow
 deny from all
</Files>
We hope this article helped you learn how to disable XML-RPC in WordPress.
If you need any further help please contact me with contact form or chat box or other way i added in the website.
So here are the other Queries related to this Topic ..
WPBakery Page Builder no longer showing for Posts Editors in dashboard.
WPbakery Dashboard/Backend Editor is not working.
Troubleshooting WPBakery Page Builder (Visual Composer) Issues on posts.
How to enable WPBakery Page Builder for posts in dashboard.
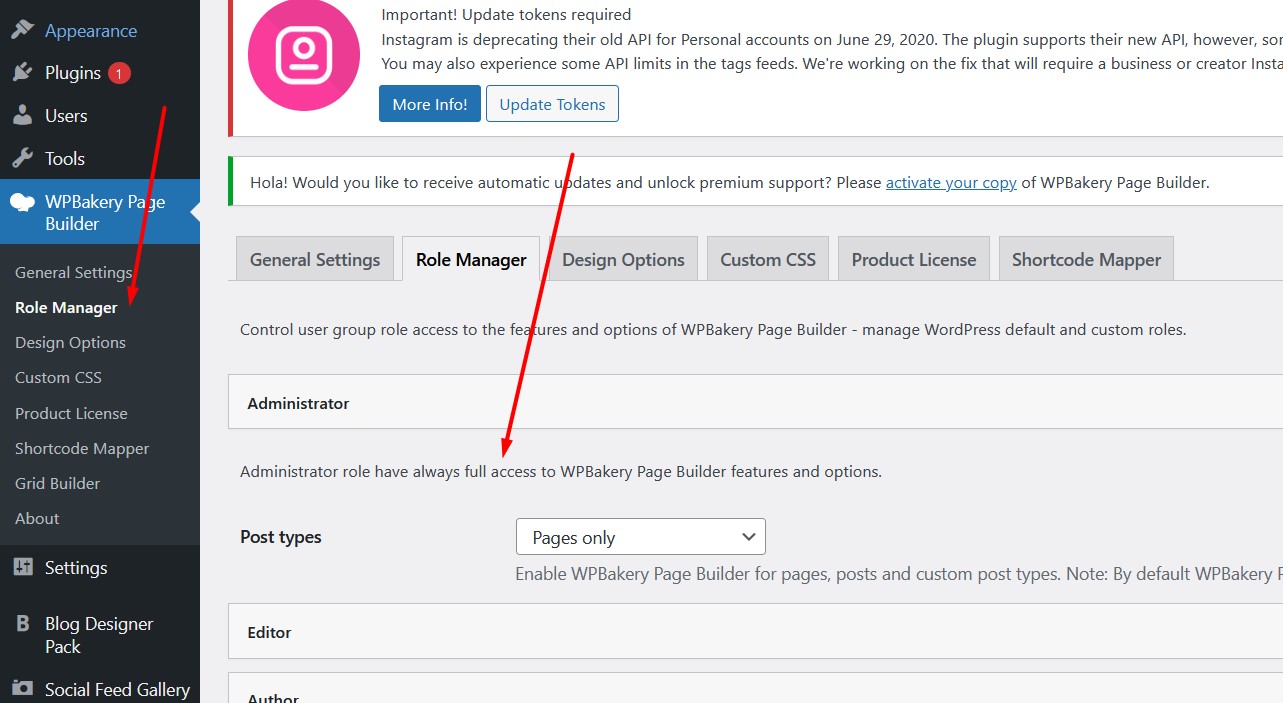
Here is the solution for your queries … Like below currently builder is not showing on posts.
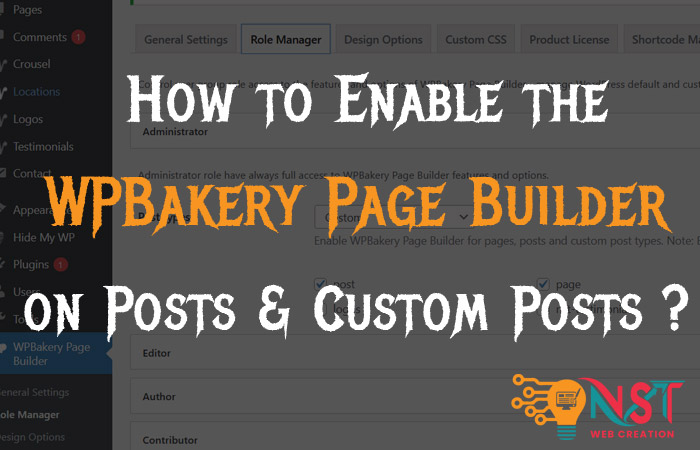
So in the dashboard visit WPBakery Page Builder >> Role Manager like in screenshot below…
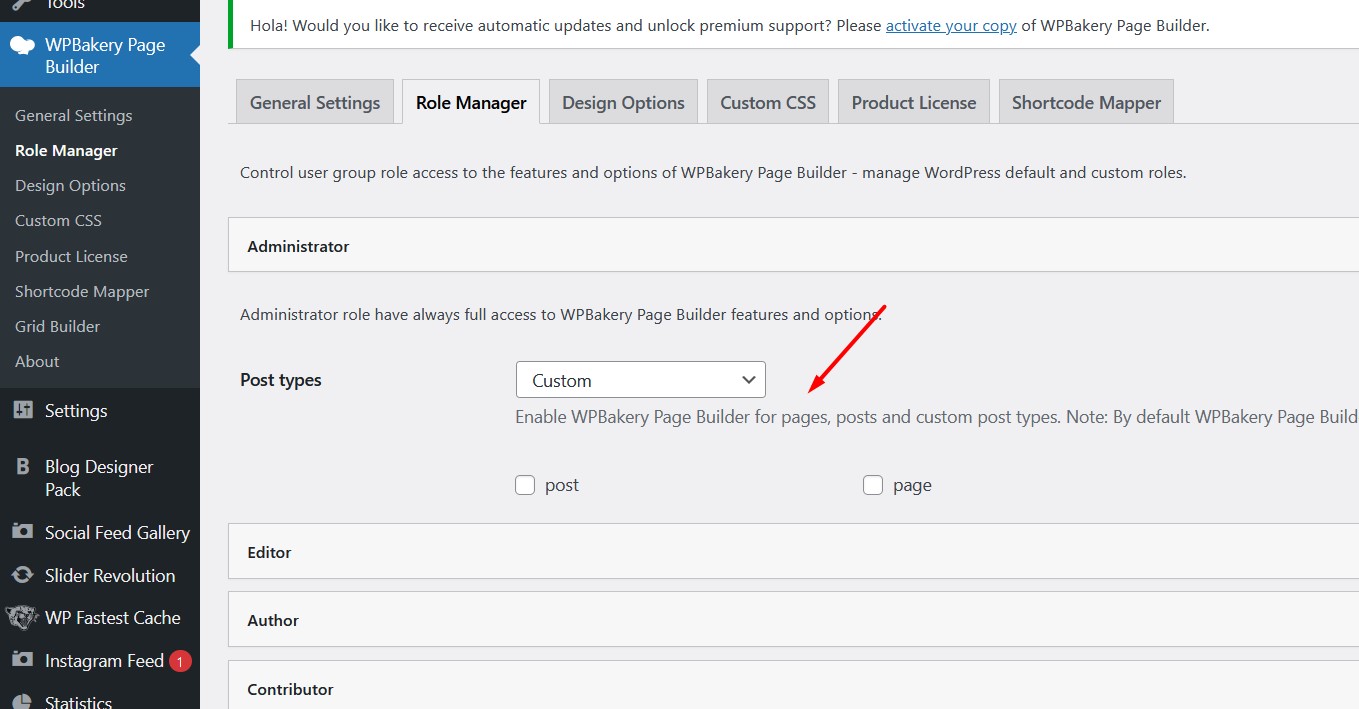
Change Post types to Custom …
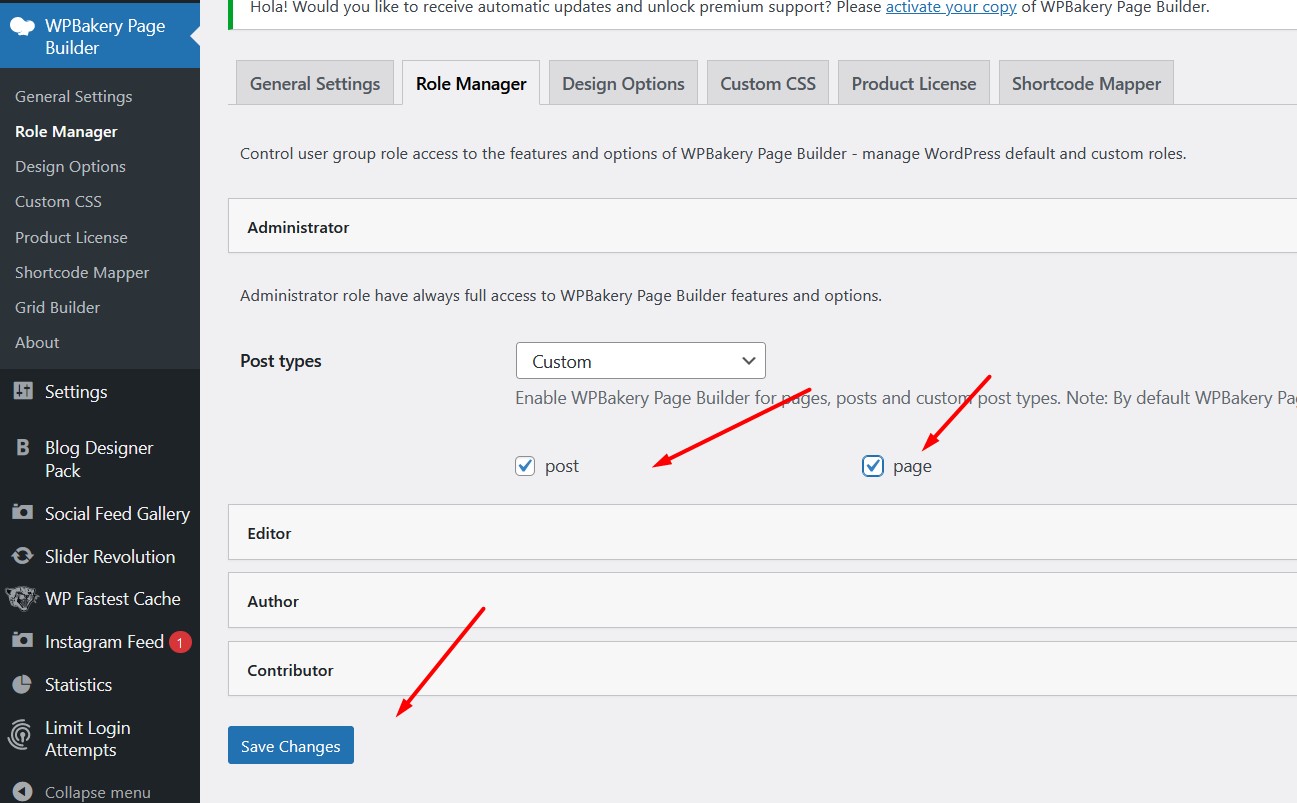
Check both checkboxes and there may be more option too… to choose there… like portfolio , testimonial etc … you can choose that too if you want to edit that things using this builder….
After the selection hit on Save Changes button and check again the posts now…
Now the WPBakery Page Builder is visible on posts to edit..
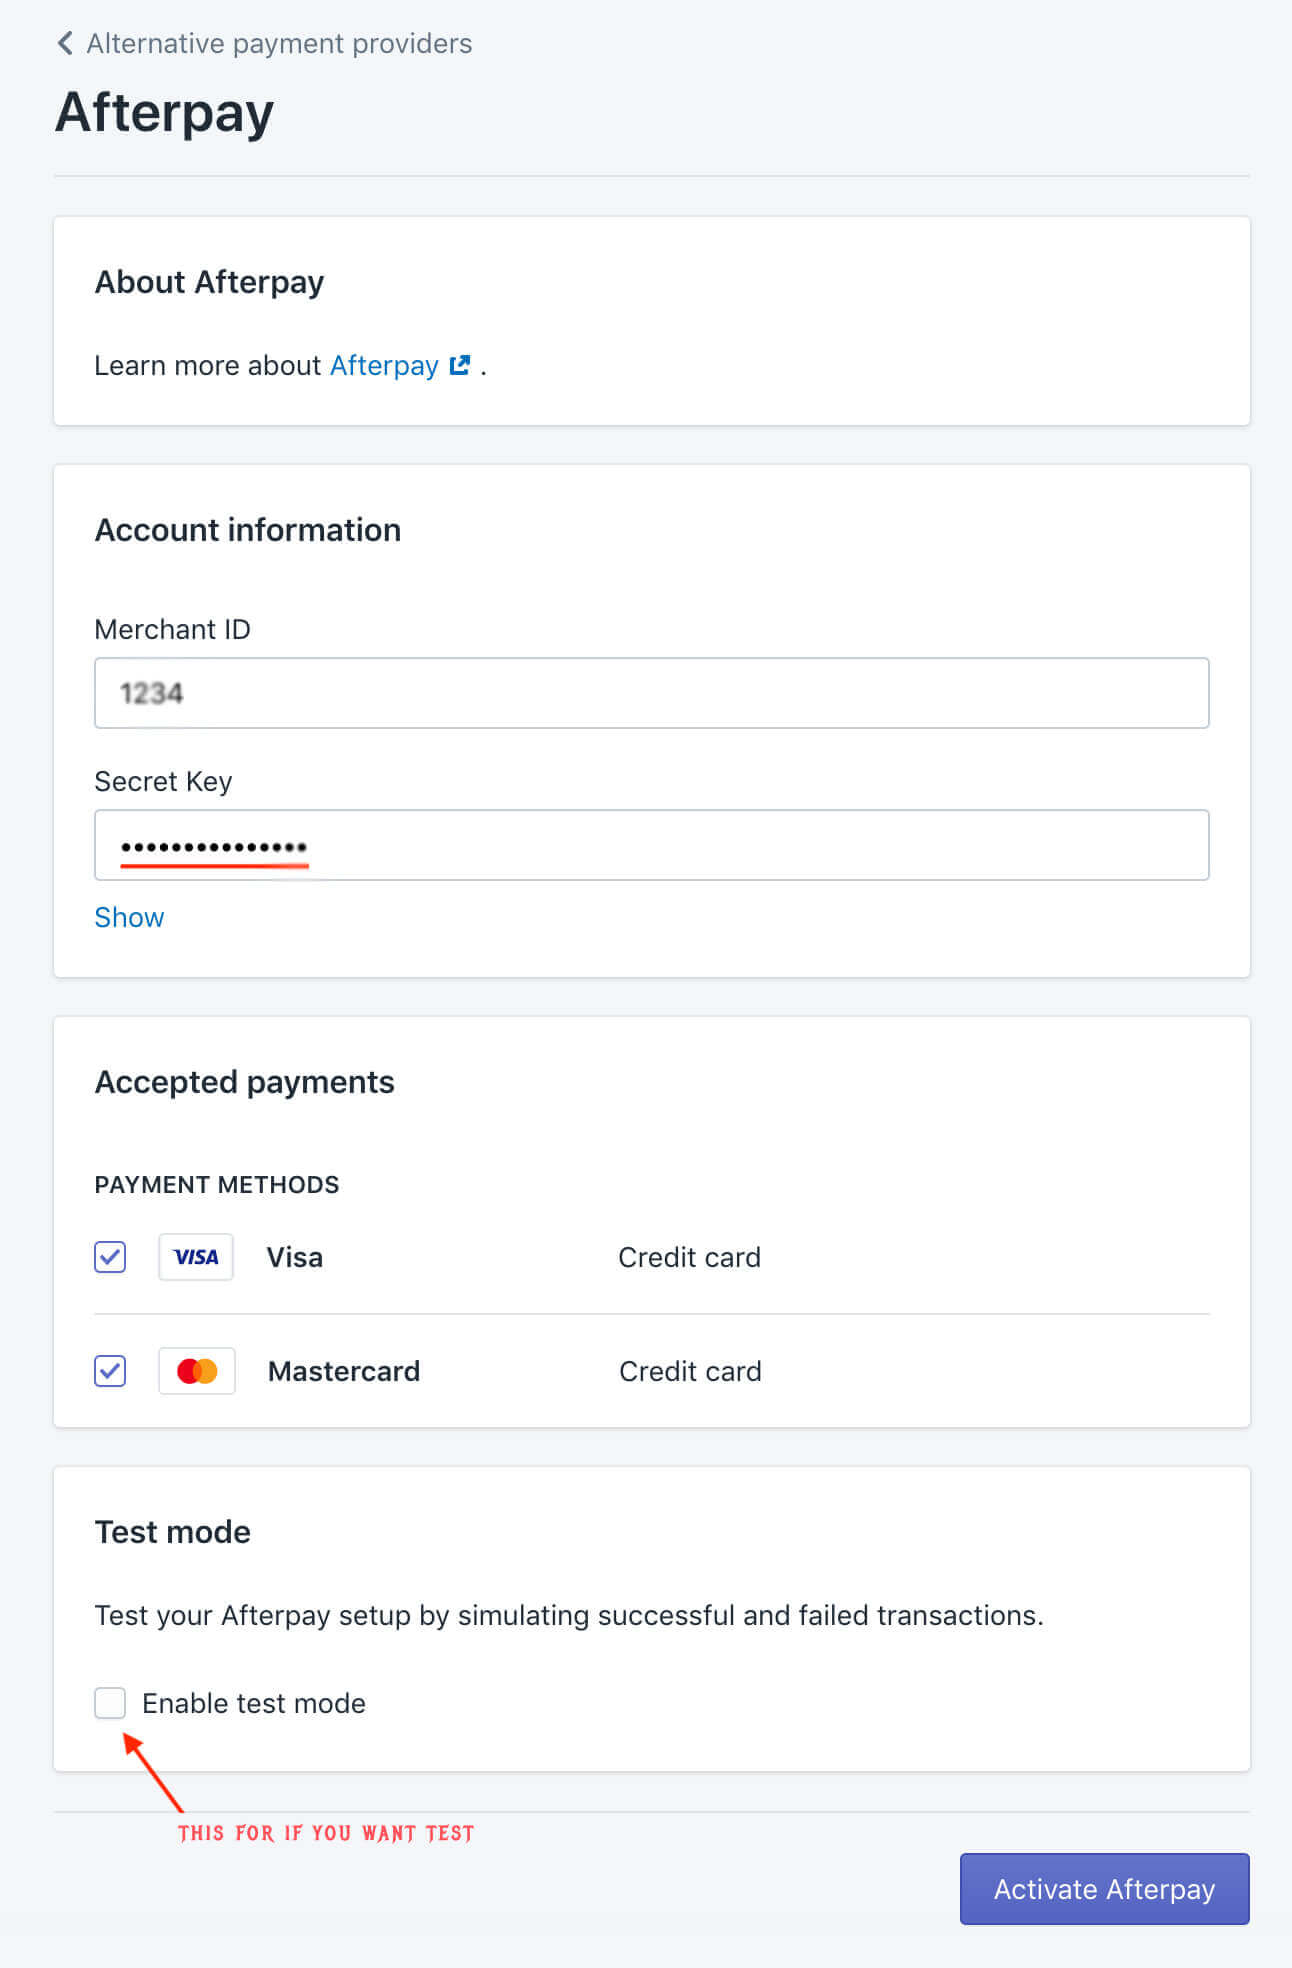
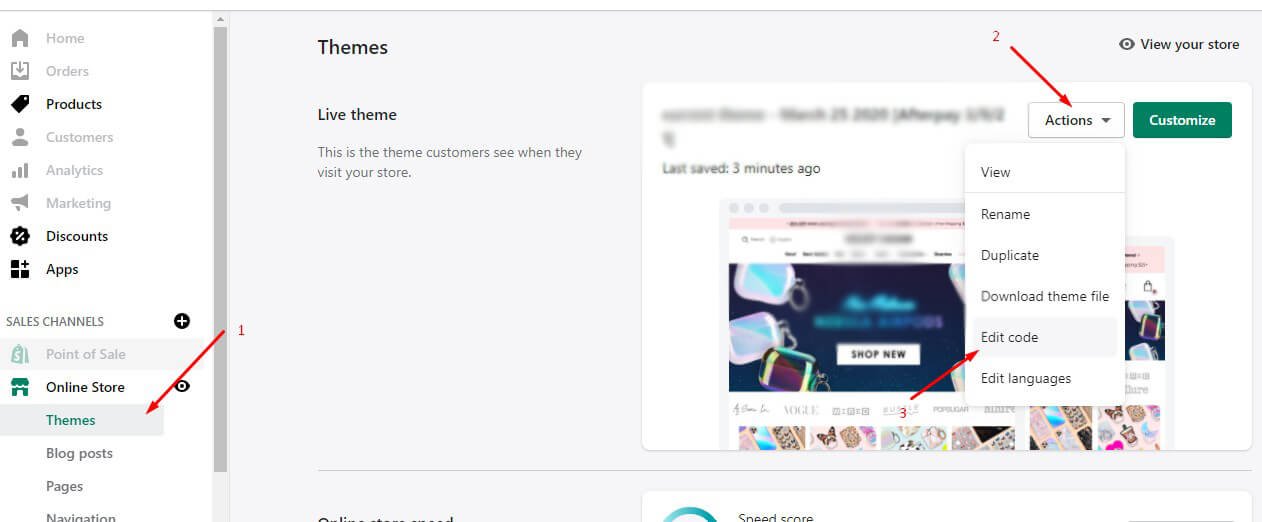
Click on Edit Code your active theme as shown below..
There are two option to add Code/Script there..
First is simply Copy that code to your theme.liquid file at the bottom of the file.
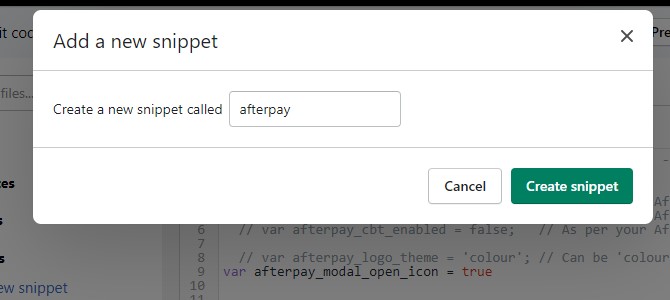
Second is using Snippets .. Follow the steps below…
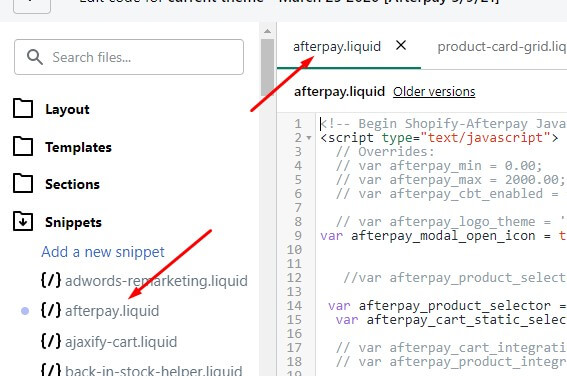
Locate to Snippets section and click on Add a new snippet and give name afterpay.
Now add that copied code to this file.
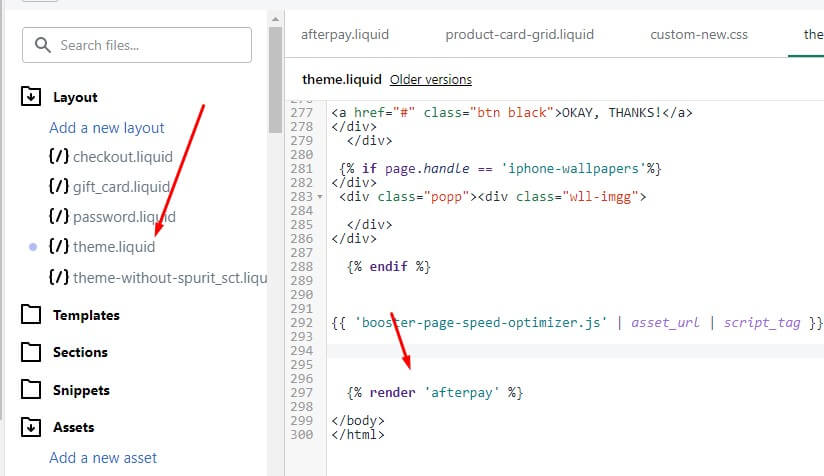
Hit on save button and now open theme.liquid file and add new one line code there.
{% render ‘afterpay’ %}
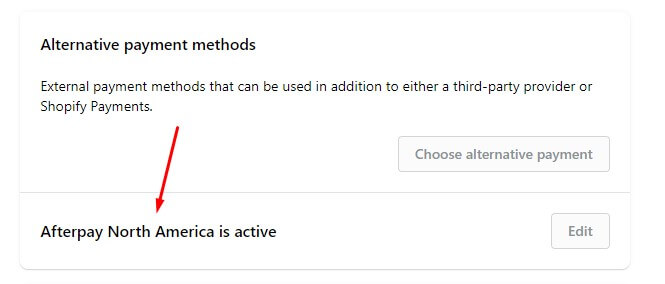
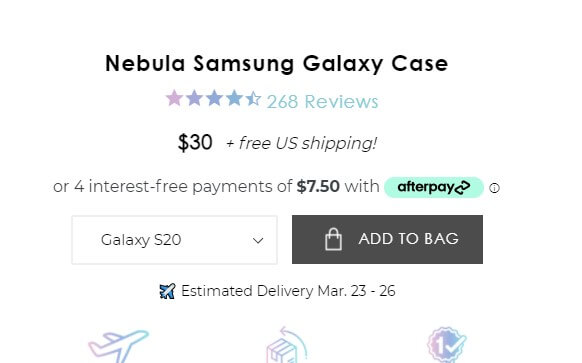
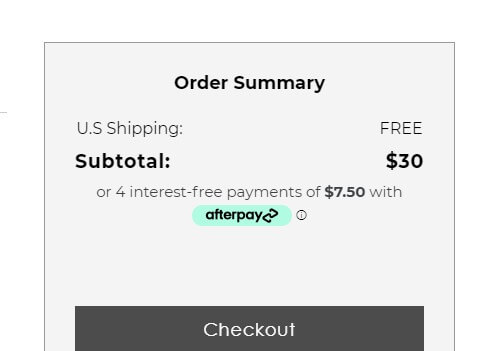
Save the file and check your website product pages and cart page. Result will be like this.
On Cart Page
Now the main thing is… if you want to show the text where you want on the page ?
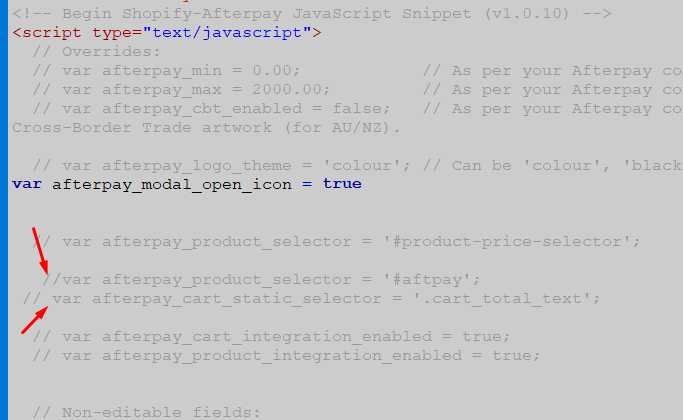
Actually it works as per Id and Class of element you can also add separate div structure or existing class in product-template.liquid file to show Afterpay text there.
If you have some html knowledge then you can edit the above code … added in the file.
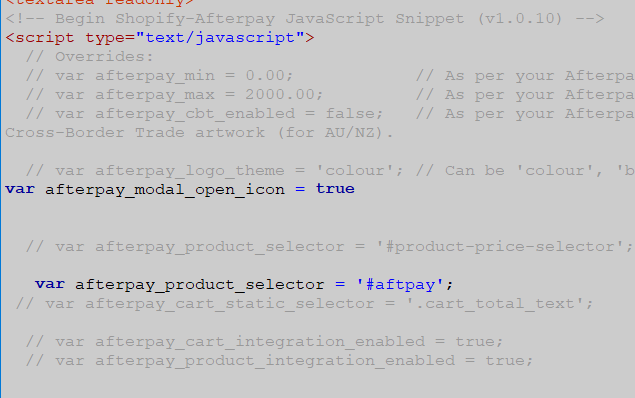
From here you have to just remove the // from the var afterpay_product_selector line. Like below..
You can add your id or class there to show afterpay text . Now afterpay text will show after that element.
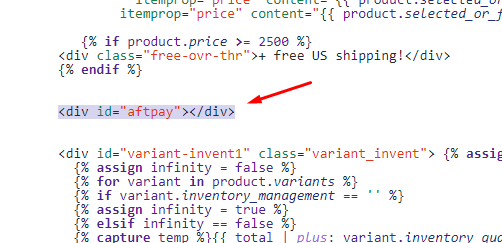
For Example .. Here i added div with id name isaftpay and now my afterpay text will show after this div id element.
The Same way you can do with Cart page.
I hope this helps you a lot.. for more help please contact with me.